all the step-by-step instructions on how to make the most perfect little Polly Dolly Doo Dah! If you’re a new customer I highly recommend that you watch these 13 video tutorials prior to starting.
Making Your Polly Dolly
Step 1
Making the head ball and attaching the wadding.
In this tutorial you’ll learn how to make the inner ball for Polly Dolly’s head by constructing a simple 6-sided fabric component for your Waldorf inspired doll. I’ll also demonstrate how to then attach the 3 layers of wadding which provides a smooth and robust shape for Polly’s head and neck.
Making Your Polly Dolly
Step 2
Attaching the tubular gauze and stuffing the chin.
In this tutorial you’ll be shown how to fit the tubular gauze for a nice snug fit over Polly Dolly’s head ball. You’ll also see how to add additional stuffing to the lower front portion of her head to make a pronounced chin, which graduates into her neck.
Making Your Polly Dolly
Step 3
Sculpting the facial features with tying string and positioning the nose.
It’s here that you’ll be given complete instruction on how to tie and fix the linen strings to sculpt Polly Dolly’s head shape. Also included is how to create the perfect little nose along with placement and attachment.
Making Your Polly Dolly
Step 4
Adding the doll jersey to the head and attaching the body.
This tutorial will show you how to pull on Polly Dolly’s head skin for a nice tight fit, avoiding any neck wrinkles that could possibly occur. You’ll also be shown how to sew around the body shape and then how to fit and attach it snugly onto her neck.
Making Your Polly Dolly
Step 5
Making and stuffing the legs and attaching them to the body.
This is the tutorial that will show you how to make a perfect pair of Polly Dolly legs. From cutting out her shapely leg and sewing them together and then onto stuffing them correctly to avoid those unsightly lumps and bumps that can sometimes appear. I’ll also show you how to sew her legs onto her body along with adding the additional stuffing that’s needed in her bottom area.
Making Your Polly Dolly
Step 6
Creating the belly button and sculpting the bottom.
In this tutorial you’ll see me create a dimpled belly button for Polly Dolly along with sculpting her cheeky little bottom that shows how to measure for correct placement.
Making Your Polly Dolly
Step 7
Making and stuffing the arms and attaching them to the body.
It’s here in this tutorial that I will show you how to make Polly Dolly’s arms. From cutting out her shaped arms and sewing them together and then onto stuffing them correctly to avoid those unsightly lumps and bumps that can sometimes appear. I’ll also show you how to sew her arms onto her body and how to shift the stuffing in her body by using a doll needle to prick and pull into place.
Making Your Polly Dolly
Step 8
Using embroidery thread to stitch the eyes and mouth.
This tutorial is unmissable, as it’s everyones nemesis … stitching the eyes and mouth onto your dolly. I’ll provide you with an easy template option for embroidering Polly Dolly’s eyes using stranded silk thread. Along with creating a lovely pair of eyes I’ll also show you how to embroider your Polly Dolly’s mouth and how to create an endearing little smile on her. Cute!
Making Your Polly Dolly
Step 9
Making and attaching the ears.
In this tutorial you’ll be shown how to make Polly Dolly’s ears. Correct placement of them will also be detailed along with how to sew them on.
Making Your Polly Dolly
Step 10
Crocheting the chain cap and sewing it to the head.
It’s here in this tutorial that I will show you how to make a really simple crochet chain for Polly Dolly’s hair cap. This is then fitted and sewn around her head in a spiral to make a secure cap for her hair lengths to be added to.
Making Your Polly Dolly
Step 11
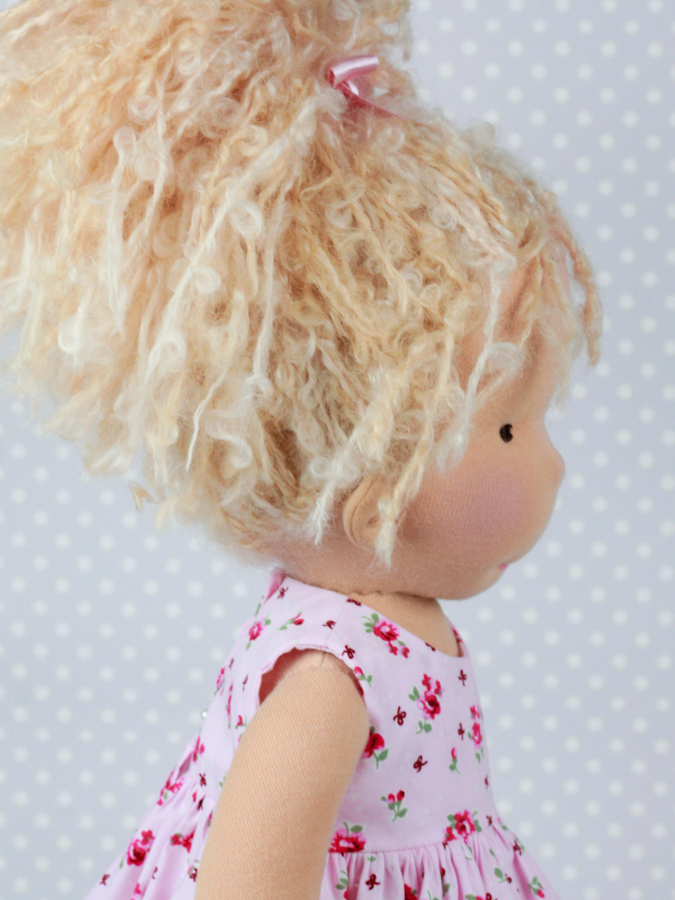
Attaching the mohair lengths and styling the hair.
This tutorial will demonstrate how to attach Polly Dolly’s hair lengths by using a really easy hook and loop method. Her signature hair style is the boucle looped mohair, but of course any other type of yarn could be used for your dolly.
Making Your Polly Dolly
Step 12
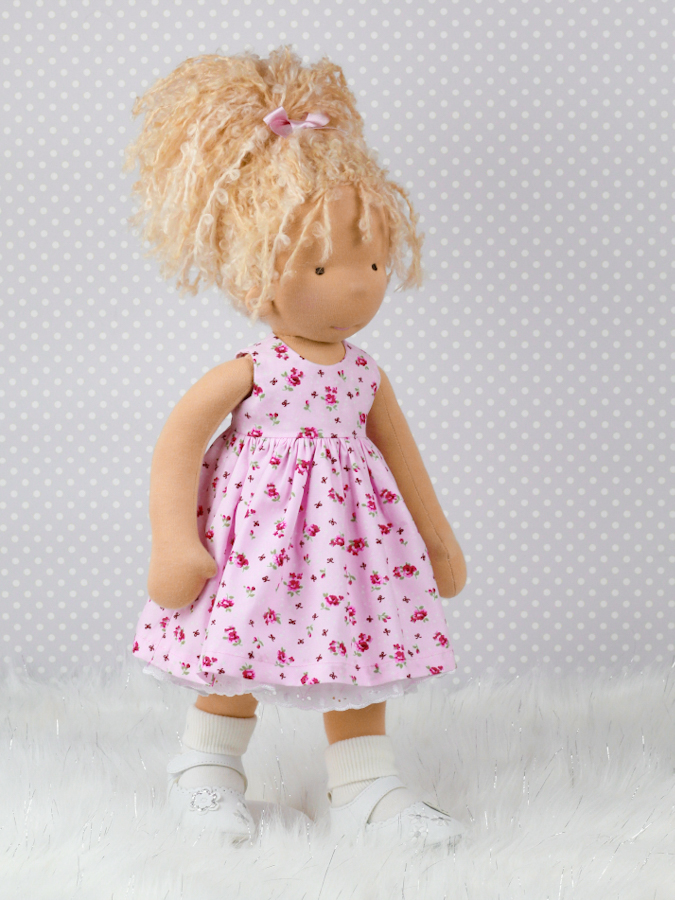
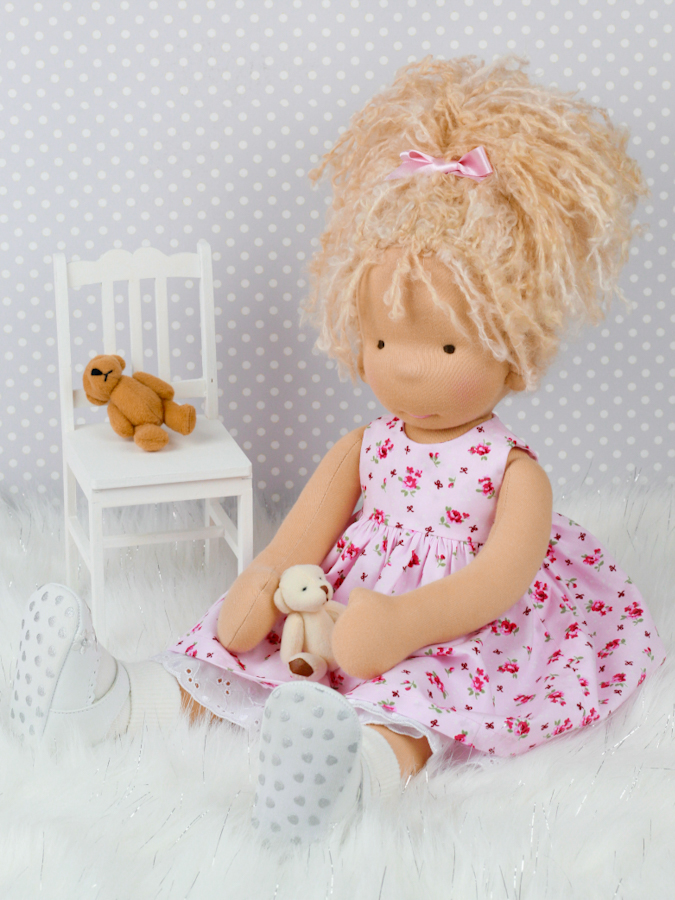
Making Polly’s pretty little sleeveless dress.
Now we’re on to making Polly Dolly’s outfit and in this tutorial you’ll be shown how to make a pretty little sleeveless dress for her. I’ll show you how to turn a bodice so that all seams are hidden along with a simple method for creating nice consistent gathers between the bodice and the skirt.
Making Your Polly Dolly
Step 13
Making the petticoat, panties and socks.
And finally I’m now going to show you how to make Polly Dolly’s underwear which consists of a lovely little cotton petticoat along with a cute pair of panties made from pointelle fabric. I’ll also show you how alter shop bought socks to fit your dolly along with discussing the best type of baby shoes that are just perfect for Polly Dolly’s feet.